How to Compress Images Without Losing Quality
Images are an important part of websites, blogs, social media, online forms, documents, and everyday digital communication. However, large image files can take longer to upload, use more storage, and may not be accepted by websites that have file-size restrictions.
If you need to reduce an image file size, change its dimensions, adjust its quality, change the image format, or prepare an image for a website, an online image compressor and resizer can make the process much easier.
Picture Compressor is an online image processing tool available at the official website PictureCompressor.co.in . The tool allows you to select an image from your computer or mobile device and adjust different image settings directly in your browser.
You can choose the new width and height, select a measurement unit, adjust resolution and DPI, select an output format such as JPG, PNG, GIF, or WEBP, and adjust image quality according to your needs.
Another important feature is browser-based processing. Your image does not need to be uploaded to a remote server for processing. The image can be processed directly within your browser, which can be useful for users who are concerned about image privacy.
In this guide, you will learn how to use Picture Compressor step by step to resize, compress, and convert your images.
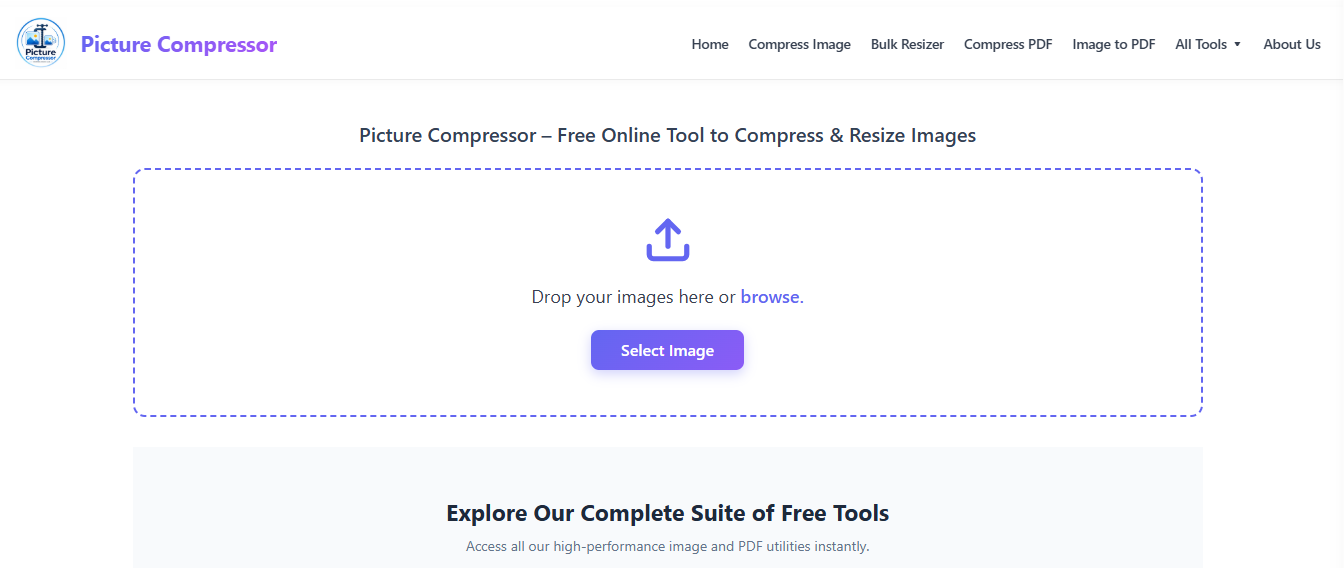
What Is Picture Compressor?
Picture Compressor is an online image processing tool designed to make common image editing tasks simple.
Instead of installing desktop software or a separate mobile application, you can open the official Picture Compressor website in a supported web browser and start working with an image.
You can select an image from your computer, laptop, smartphone, or other supported device and then choose the settings you need.
Depending on your requirements, you can adjust:
- Image width
- Image height
- Measurement unit
- Resolution
- DPI
- Image format
- Image quality
- Background settings
After selecting your preferred settings, you can process the image and download the resulting file.
How to Compress and Resize an Image Using Picture Compressor
Using Picture Compressor is a simple process. You do not need advanced image-editing knowledge to get started.
Follow the steps below to compress, resize, or convert an image using the tool.
Step 1: Open the Official Picture Compressor Website
First, open the official Picture Compressor website in your web browser:
https://picturecompressor.co.in/
The main tool is available directly on the website, so you can begin the image-processing process without navigating through complicated menus.
Picture Compressor can be accessed from a desktop, laptop, tablet, or mobile device with a compatible browser.
Step 2: Click Select Image
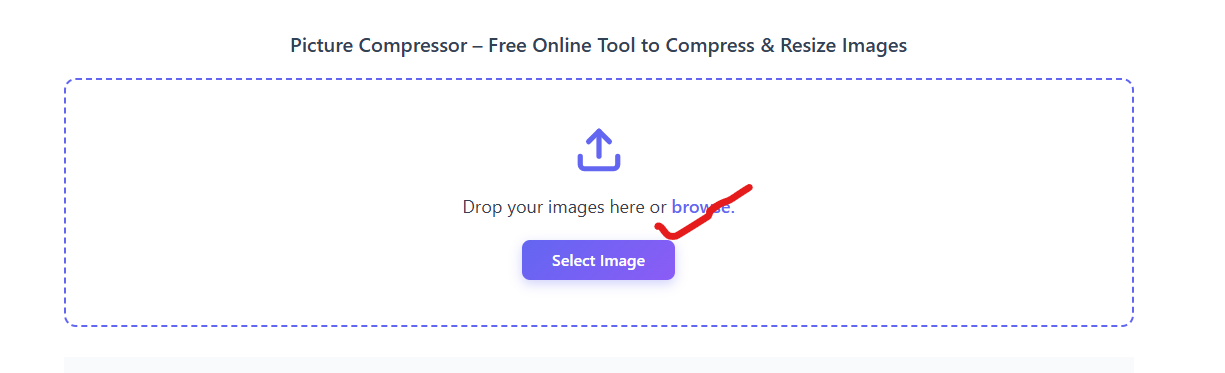
Once the Picture Compressor tool is open, look for the Select Image option.
Click or tap Select Image.
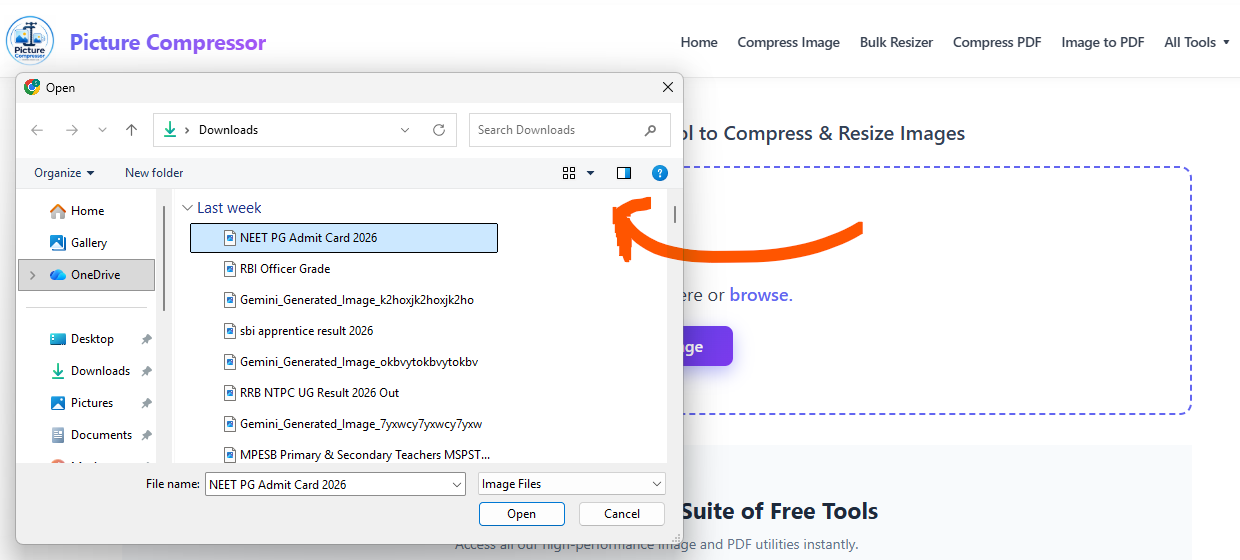
Your device will then open its file-selection interface.
On a desktop or laptop, you can select an image from a folder on your computer.
On a smartphone, the file picker may allow you to select an image from your Gallery, Photos, Files, or another available location.
Choose the image that you want to compress, resize, or convert.
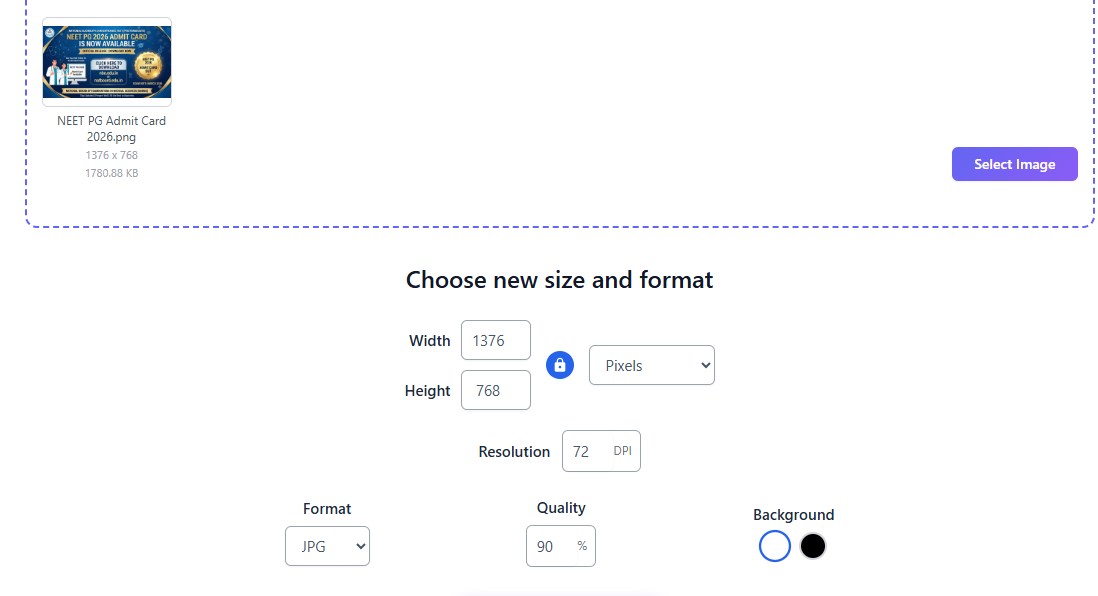
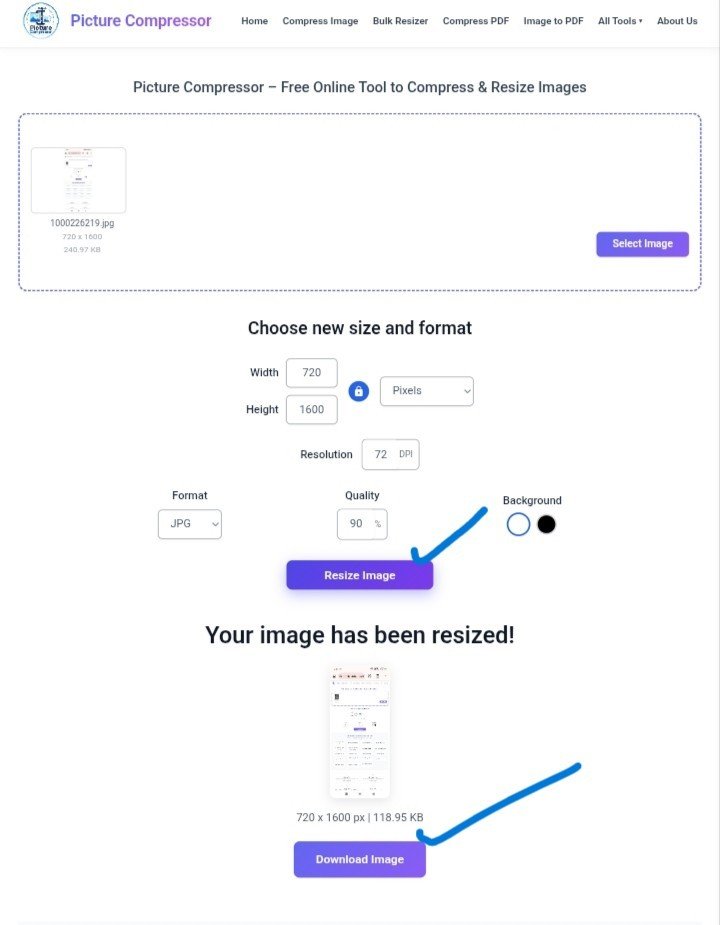
Step 3: Choose the New Size and Format
After selecting an image, the tool provides the available image-processing settings.
You will see a section such as Choose New Size and Format.
This section allows you to customize the image according to your requirements.
Depending on what you need to do with the image, you can change:
- Width
- Height
- Unit
- Resolution
- DPI
- Format
- Quality
- Background
You do not necessarily need to change every setting. If you only want to resize an image, you can adjust the dimensions and process it.
If you want to change the file format or reduce the file size, you can adjust the appropriate settings before processing the image.
How to Change Image Width and Height
The Width and Height settings control the dimensions of your image.
For example, if you have a very large image and need a smaller version for a website, you can enter the required width and height.
This can be useful when a website, application, online form, or other platform requires a particular image dimension.
Width
Width determines how wide the output image will be.
Height
Height determines how tall the output image will be.
Choose the dimensions that match your intended use.
If you are resizing an image for a specific website or application, check that platform's recommended dimensions before selecting the final size.
Choose the Image Size Unit
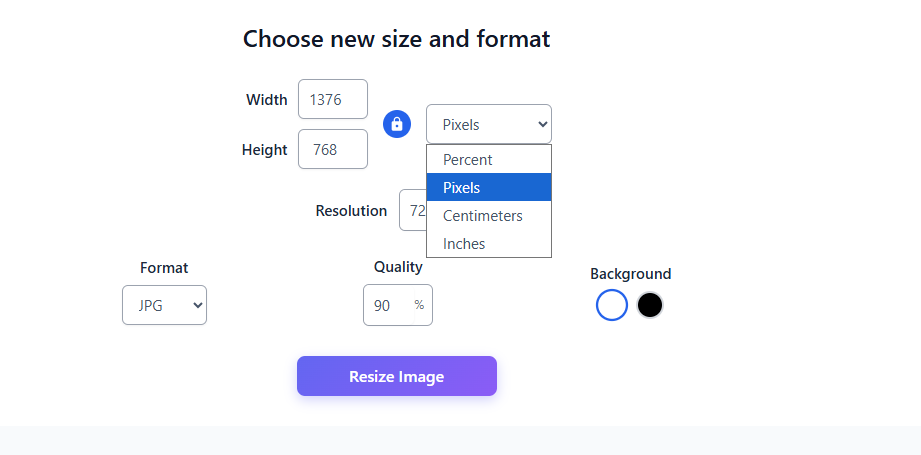
Picture Compressor provides different unit options for working with image dimensions.
Depending on the available settings, you can choose from options such as:
- Percent
- Pixels
- Centimeters
- Inches
Percent
The Percent option can be useful when you want to resize an image relative to its original dimensions.
Pixels
Pixels are commonly used for digital images and websites. If you need an image with specific digital dimensions, you can use the Pixels option.
Centimeters
Centimeters may be useful when working with image dimensions for documents or certain print-related requirements.
Inches
Inches can be useful for particular printing or document-related requirements.
Select the unit that best matches your intended use and then enter the required dimensions.
How to Change Image Resolution and DPI
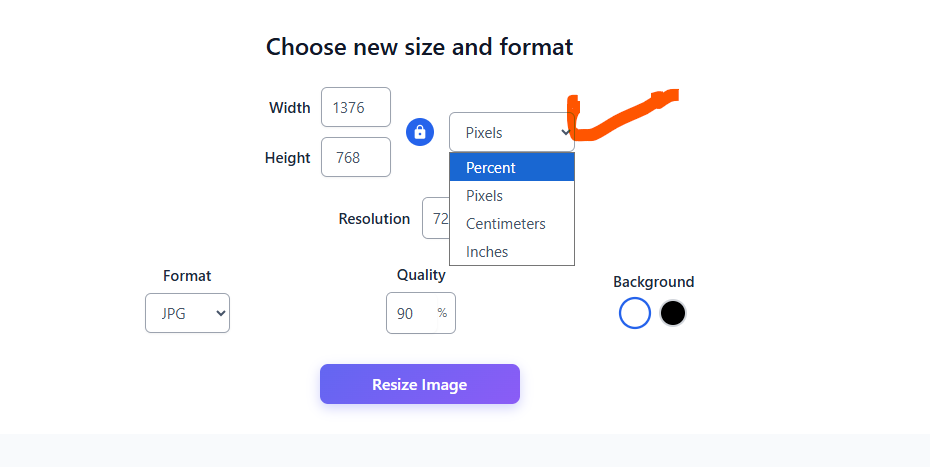
Picture Compressor also provides options related to Resolution and DPI, where supported by the tool.
Resolution can be important when preparing images for different purposes.
Digital images used on websites may have different requirements from images prepared for printing or documents.
What Does DPI Mean?
DPI stands for Dots Per Inch.
DPI is commonly associated with print-related image requirements. If you have a specific DPI requirement, you can enter the appropriate value in the DPI field.
Keep in mind that changing DPI does not automatically improve the visual quality of an image. The appropriate setting depends on how the image will be used.
How to Change Image Format
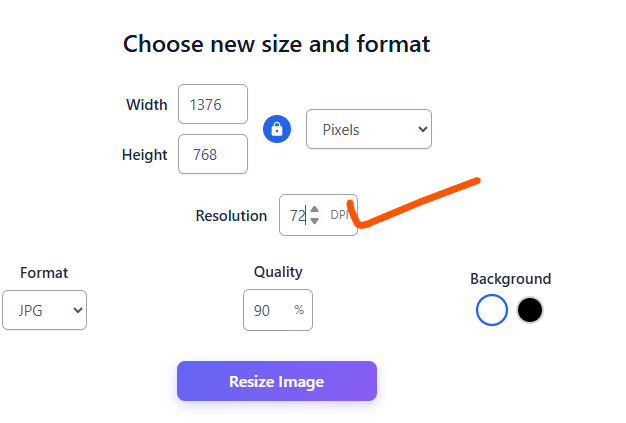
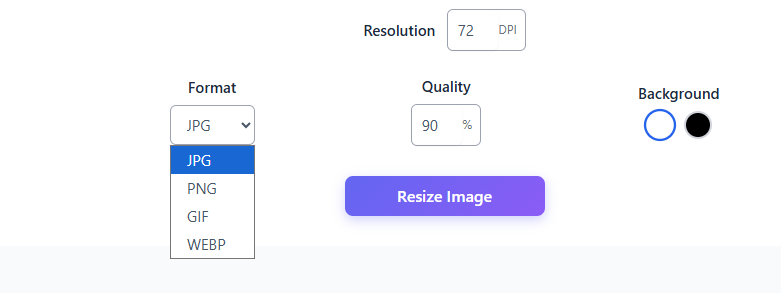
Picture Compressor allows you to select an output image format from the formats available in the tool.
The available options include:
- JPG
- PNG
- GIF
- WEBP
Different image formats are suitable for different situations.
JPG
JPG, also known as JPEG, is widely used for photographs and other images with many colors.
PNG
PNG is commonly used for graphics, screenshots, logos, and images where transparency may be important.
GIF
GIF is commonly associated with simple graphics and animated images.
WEBP
WEBP is a modern image format that is widely used on websites. It can be a useful choice for many web images.
When choosing an image format, consider where the image will be used and whether the destination platform supports that format.
How to Adjust Image Quality
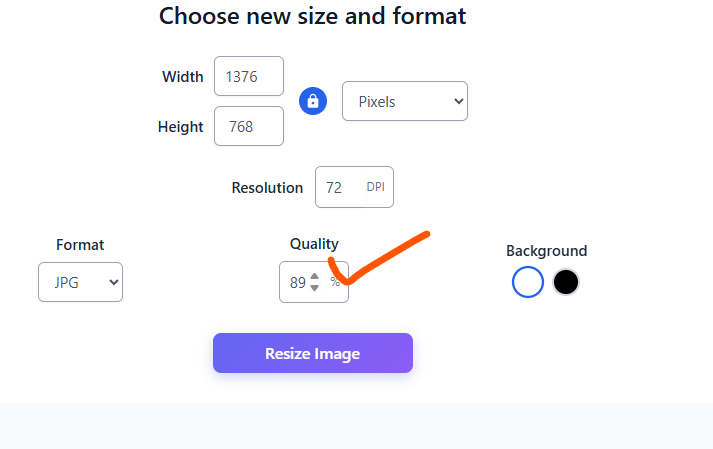
The Quality setting allows you to control the output image quality using a percentage value.
Quality and file size often involve a trade-off.
A higher quality setting may preserve more visual detail but can result in a larger file.
A lower quality setting may produce a smaller file but can introduce visible compression artifacts depending on the image.
For this reason, there is no single quality percentage that is perfect for every image.
A photograph, screenshot, logo, illustration, and graphic may respond differently to the same quality setting.
Choose a reasonable quality level, process the image, and check the result. If necessary, you can adjust the quality and process the image again.
How to Use the Background Setting
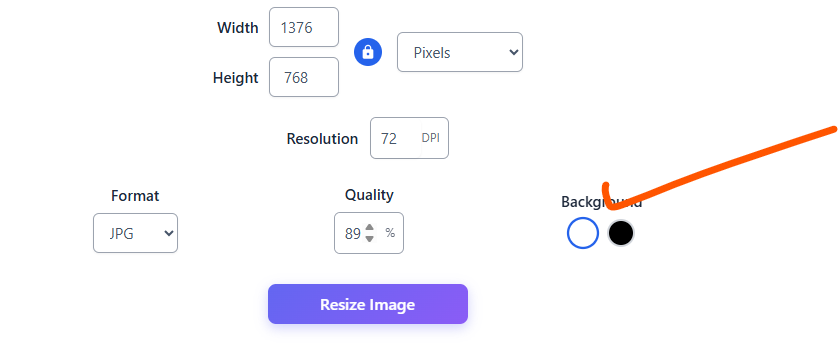
Depending on the selected image format and the available tool settings, you may also see a Background option.
Background settings can be useful when working with images where transparency or a specific background appearance is important.
Before processing an image, select the appropriate background option according to your requirements.
Step 4: Click Resize Image
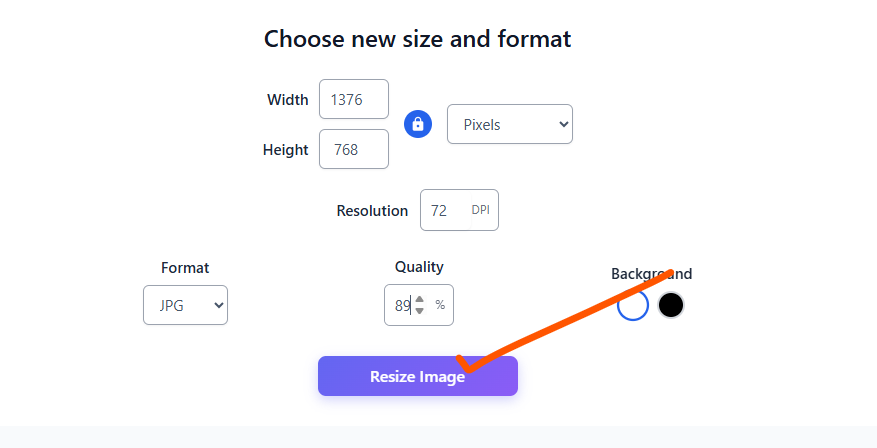
After selecting your preferred settings, click the Resize Image button.
The tool will process the image according to the settings you selected.
Picture Compressor uses browser-based processing for the image-processing workflow. This means the image can be processed directly in your browser instead of being sent to a remote server for processing.
The processing time can vary depending on the image, file size, device, browser, and selected settings. For many normal image-processing tasks, the result can appear very quickly.
Step 5: Check the Processed Image
Once processing is complete, the resulting image will be displayed.
Check the output image to make sure it looks the way you want.
You can check:
- Image appearance
- Dimensions
- Quality
- Format
- Background
- Overall result
If the result is not what you expected, you can return to the settings and process the image again with different values.
For example, you may increase the quality percentage if the image looks too compressed, or reduce the dimensions if the resulting file is still larger than you need.
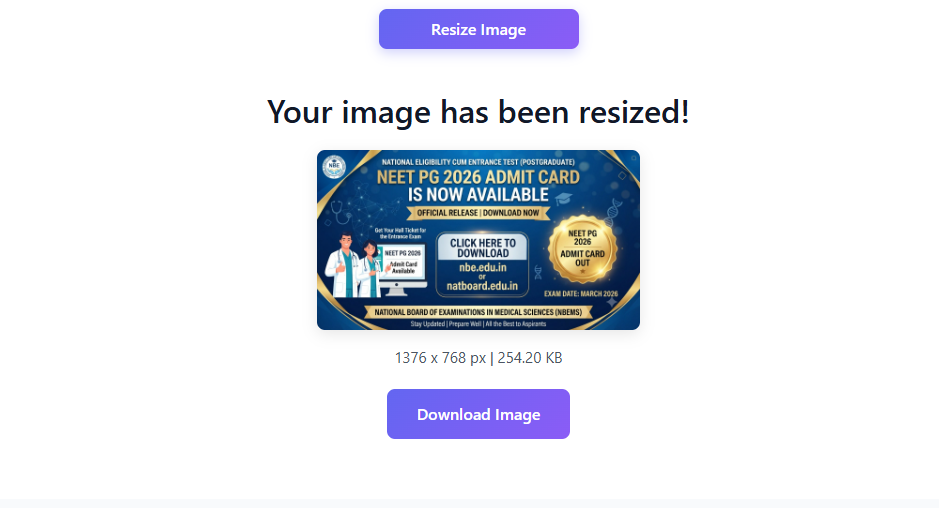
Step 6: Download the Processed Image
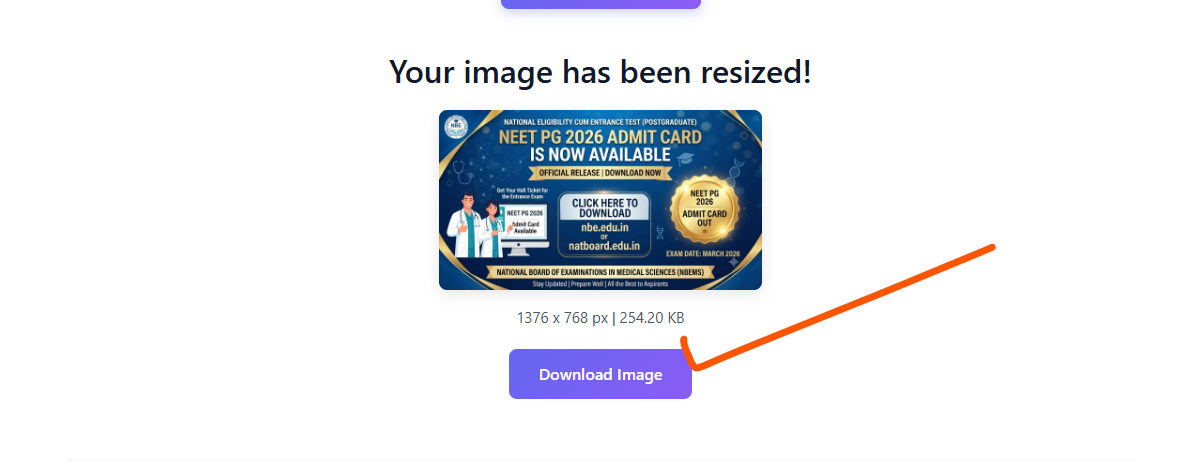
After you are satisfied with the result, look below the processed image for the Download Image option.
Click or tap Download Image.
The processed image will then be downloaded to your device.
On a desktop or laptop, the file will normally be saved according to your browser's download settings.
On a mobile device, the file may appear in your browser's Downloads folder or another location determined by the device and browser.
Does Picture Compressor Upload Images to a Server?
Image privacy is an important consideration when using online image tools.
Picture Compressor is designed to process images directly within the user's browser. The image does not need to be uploaded to a remote server for the processing workflow.
Browser-based processing can be useful for people who want to work with personal photos, screenshots, documents, or other images without sending those files to an image-processing server.
Because the processing happens in the browser, your image can remain within the local browser environment during processing.
Privacy Note: For privacy-sensitive files, always make sure you are using the official Picture Compressor website and review the website's privacy information before using the tool.
Official website: PictureCompressor.co.in
Why Use Picture Compressor?
Picture Compressor can be useful for people who need a simple way to work with images without installing dedicated image-editing software.
1. Simple Image Selection
You can select an image directly from your computer or mobile device.
2. Resize Images
You can change the width and height according to your requirements.
3. Multiple Measurement Units
You can work with units such as Percent, Pixels, Centimeters, and Inches.
4. Resolution and DPI Settings
You can adjust resolution-related settings when required.
5. Multiple Image Formats
You can choose from available formats such as JPG, PNG, GIF, and WEBP.
6. Quality Adjustment
You can adjust the output quality percentage according to your requirements.
7. Fast Browser-Based Processing
The image-processing workflow takes place directly in the browser, and processing can be very fast for normal image files.
8. Easy Download
Once processing is complete, you can download the resulting image directly.
9. No Software Installation
You can access the tool through a compatible web browser without installing a separate image-compression application.
How to Compress an Image Without Losing Too Much Quality
It is important to understand that image compression can involve a balance between file size and visual quality.
If your goal is to reduce the file size while keeping the image looking good, consider the following tips.
Use Appropriate Dimensions
Do not keep an image much larger than necessary.
If an image will only be displayed at a relatively small size on a website, an extremely large resolution may not be necessary.
Reducing unnecessary dimensions can help reduce the amount of image data.
Choose the Right Format
Different formats are designed for different types of images.
JPG can be useful for many photographs, PNG can be useful for graphics and transparency, and WEBP can be a useful choice for many modern websites.
Adjust Quality Carefully
Do not immediately choose an extremely low quality setting. Start with a reasonable quality level and check the result.
Check the Output
Always check the processed image before using it.
- Look for blurry details.
- Check for compression artifacts.
- Check whether transparency is preserved when required.
- Verify the dimensions.
- Check the background.
- Make sure the visual quality is acceptable.
If necessary, process the image again with different settings.
How to Compress Images on a Mobile Phone
Picture Compressor can also be used from a mobile browser.
The basic process is simple:
- Open the official Picture Compressor website.
- Tap Select Image.
- Choose an image from your Gallery, Photos, or Files.
- Enter the required Width and Height.
- Select the appropriate unit.
- Adjust Resolution or DPI if required.
- Choose the output Format.
- Adjust Quality.
- Select the appropriate Background setting if needed.
- Tap Resize Image.
- Check the processed image.
- Tap Download Image.
How to Compress Images on a Desktop or Laptop
You can also use Picture Compressor on a desktop or laptop.
Open PictureCompressor.co.in in your browser and click Select Image.
Choose the image from your computer.
After selecting the image, choose the settings you need.
You can adjust:
- Width
- Height
- Unit
- Resolution
- DPI
- Format
- Quality
- Background
Then click Resize Image.
Once processing is finished, review the output and click Download Image to save the processed file.
Who Can Use Picture Compressor?
Website Owners
Website owners can resize and optimize images before adding them to web pages.
Bloggers
Bloggers can prepare images for articles, featured images, and other website content.
Students
Students may need to reduce image sizes for online assignments, applications, or document submissions.
Online Form Users
Some online forms have restrictions on image dimensions or file sizes. Resizing or compressing an image may help prepare it for submission.
Social Media Users
Users can resize images before uploading them to different social platforms.
Photographers and Creators
Creators can create smaller versions of images for websites, previews, sharing, or other digital purposes.
Frequently Asked Questions
Can I compress an image without losing quality?
Image compression can reduce file size while maintaining good visual quality, but the exact result depends on the image, format, dimensions, and quality settings. For the best balance, adjust the settings gradually and check the resulting image.
Can I resize an image using Picture Compressor?
Yes. You can select the required Width and Height and then process the image using the Resize Image option.
Can I use Picture Compressor on my phone?
Yes. You can open the official Picture Compressor website in a compatible mobile browser and select an image from your Gallery, Photos, or Files.
Which image formats are supported?
The tool provides format options including JPG, PNG, GIF, and WEBP. Available processing capabilities may depend on the specific image and browser environment.
Can I change JPG to WEBP?
If the image format options available in the tool support the required conversion, you can select the desired output format before processing the image.
Can I change PNG to JPG?
You can select JPG as the output format when the tool supports processing the selected PNG image and the conversion is compatible with your image.
Can I change the image resolution?
Yes. The tool includes Resolution and DPI-related settings where available.
Can I change the image width and height?
Yes. You can enter the desired Width and Height before processing the image.
Can I use Pixels, Percent, Centimeters, or Inches?
The tool provides these measurement options for working with image dimensions.
Do I need to install software?
No separate image-compression software is required. You can access the tool through a compatible web browser.
Are images uploaded to a server for processing?
The image-processing workflow is performed directly in the browser, so the image does not need to be uploaded to a remote server for processing.
How quickly does image processing happen?
Processing time depends on factors such as the image size, device performance, browser, and selected settings. Normal image-processing tasks can often be completed very quickly.
Final Thoughts
Reducing image size does not always mean sacrificing image quality. With the right combination of dimensions, format, resolution, and quality settings, you can prepare an image for many different digital uses.
Picture Compressor provides a simple browser-based way to resize, compress, and process images without requiring separate software.
The process is straightforward:
Open Picture Compressor → Select Image → Choose Size and Format → Adjust Settings → Resize Image → Check Result → Download Image
You can access the official Picture Compressor website here:
https://picturecompressor.co.in/
Whether you are using a desktop, laptop, tablet, or mobile phone, the tool can help you prepare images according to your requirements.
For the best results, always choose dimensions and quality settings based on how the image will actually be used. If the first result is not suitable, adjust the settings and process the image again.
Official Website